


ValueFirst WhatsApp Integration with Leadsquared
Introduction
ValueFirst has created a specialized wrapper to seamlessly integrate LeadSquared CRM with ValueFirst's WhatsApp API. This solution enables customers to efficiently send WhatsApp messages to their users directly from their CRM, ensuring streamlined communication and enhanced user engagement.
Pre-requisites
You need to have an XML account for the WhatsApp channel API. Get the account details (Username, Password, WhatsApp number.)
Ensure that the IP (203.212.66.253, 10.0.13.11) is whitelisted against the XML account on the ValueFirst side.
Configuration
Step 1 – LeadSquared WhatsApp Client Configuration
Install WhatsApp Business App
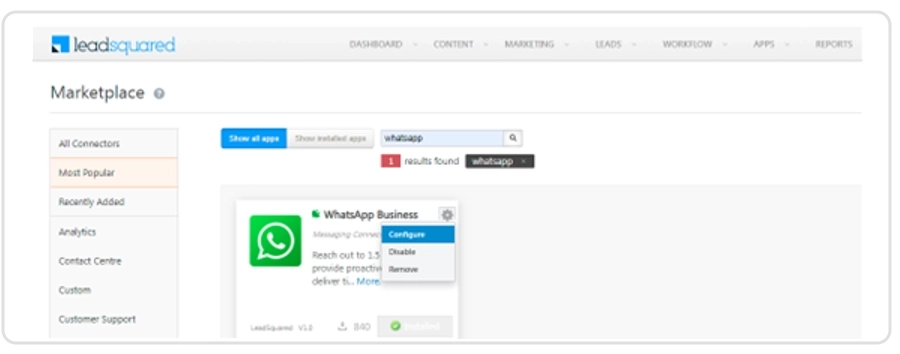
- Navigate to the LeadSquared App Marketplace and install the "WhatsApp Business" app.
- After installation, click Configure to set up the WhatsApp account.
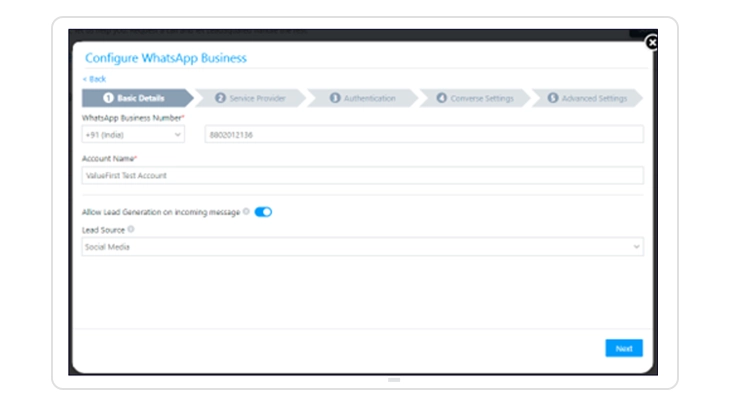
Step 2 - Add WhatsApp Number
- Click on Add Number. A form will appear where you need to input the following details:
- WhatsApp Number: Add your business WhatsApp number.
- Other Required Fields: Fill out the requested details. Click Next to proceed.
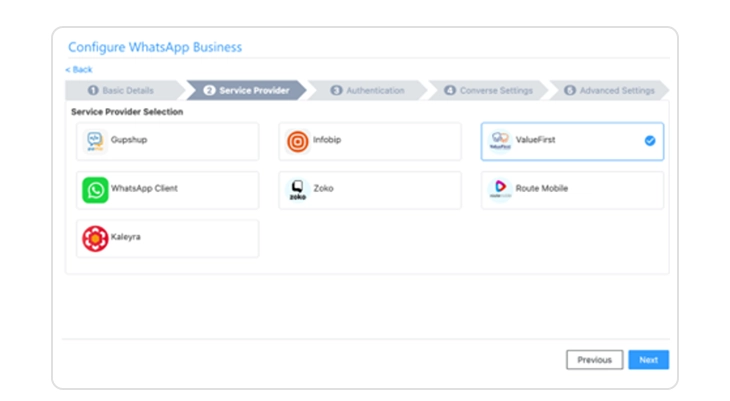
Step 3 - Select ValueFirst
- On the next screen, select ValueFirst from the list of service providers.
- Click Next to move to the next step.

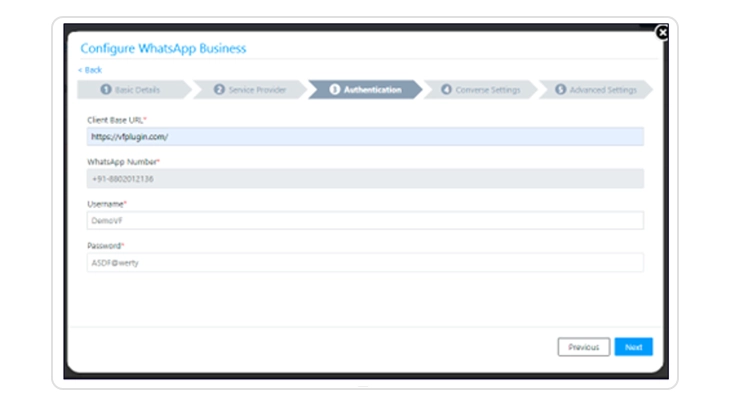
Step 4 - Enter WhatsApp API Credentials
In the API Credentials section, provide the following details:
- Username: Provided by the ValueFirst team.
- Password: Provided by the ValueFirst team.
- Click Next to continue
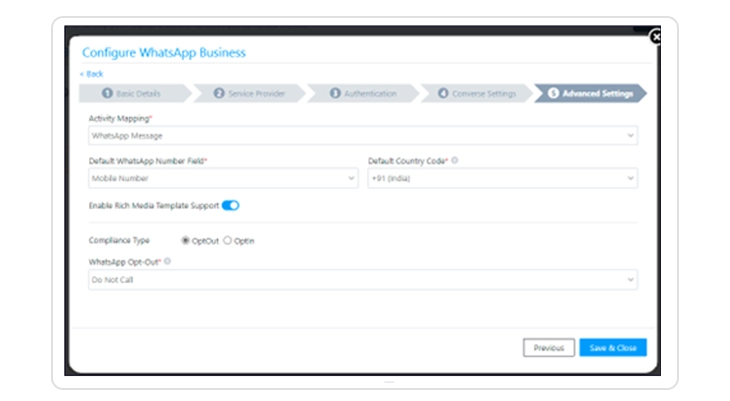
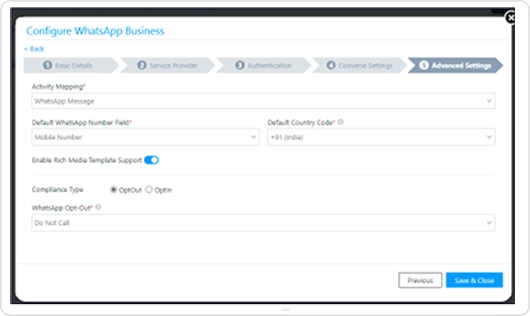
Step 5 - Configure Advanced Settings
- No action is needed on the Converse Settings page. Simply click Next.
- On the Advanced Settings page, fill in the following details:
- Activity Mapping: Select WhatsApp Message from the dropdown.
- Default WhatsApp Number Fields: Choose the field (e.g., mobile number or phone number) for sending WhatsApp messages.
- Default Country Code: Select India or your applicable country code.
- Enable Rich Media Template Support: Toggle this option to enable it.
- Compliance Type: Select either Opt-In or Opt-Out.
- WhatsApp Opt-Out: Based on the compliance type, select the appropriate value from the dropdown. Click Save & Close to complete the configuration.
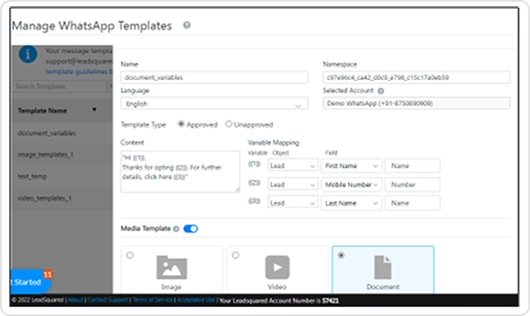
Step 6 - Adding WhatsApp Templates in LeadSquared
- Access WhatsApp Templates.
- Navigate to Apps > WhatsApp Templates from the top menu.
- Click Add Template to open the template creation form. Input Template Details.
- Name: Enter a unique template name in lowercase with no spaces.
- Namespace: Add the ValueFirst Template ID provided.
- Language: Specify the language of the template.
- Content: Input the template text. Use placeholders like {{1}}, {{2}}, {{3}} for dynamic variables.
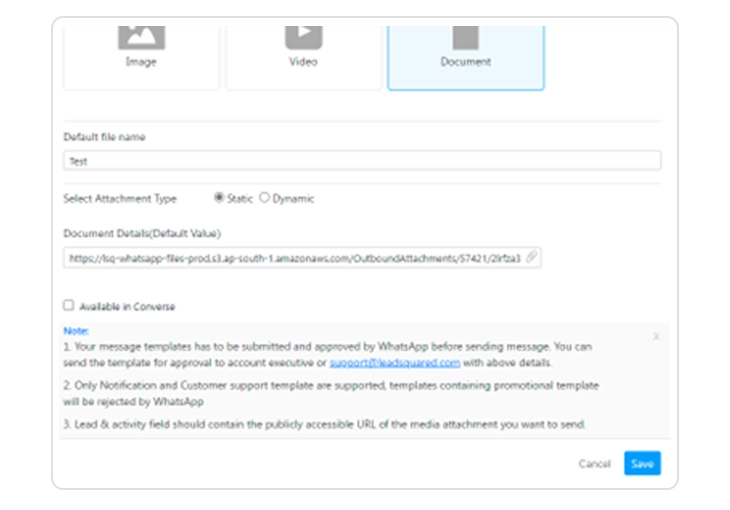
- Media Template: Choose a media type if required (e.g., image, document).
- Select Attachment Type: Choose Static or Dynamic based on your requirements.
- Document Details: Provide a URL or upload the file to generate a URL.
- Save the template once all details are filled.

Step 7 - Setting Up the ValueFirst Wrapper
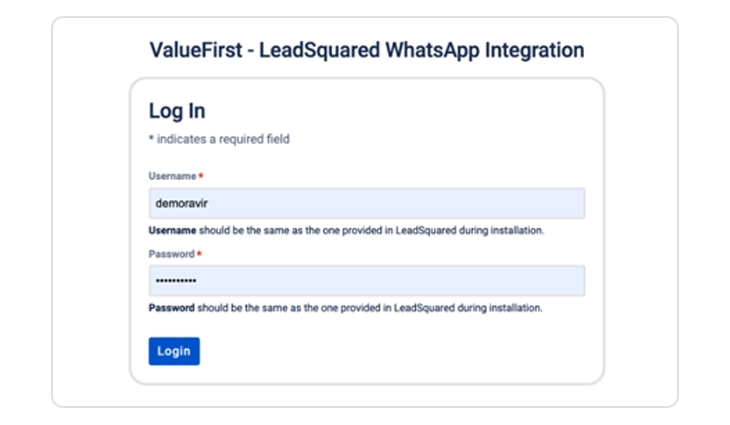
- Access the ValueFirst Plugin.
- Open https://vfplugin.com in your browser.
- Log in using the Username and Password provided by the ValueFirst team.
Step 8 - Authenticate ValueFirst Account
- After logging in, provide the following details: WhatsApp Number, Username, Password.
- Click the Authenticate button. A message will confirm successful authentication: "Successfully authenticated ValueFirst account.
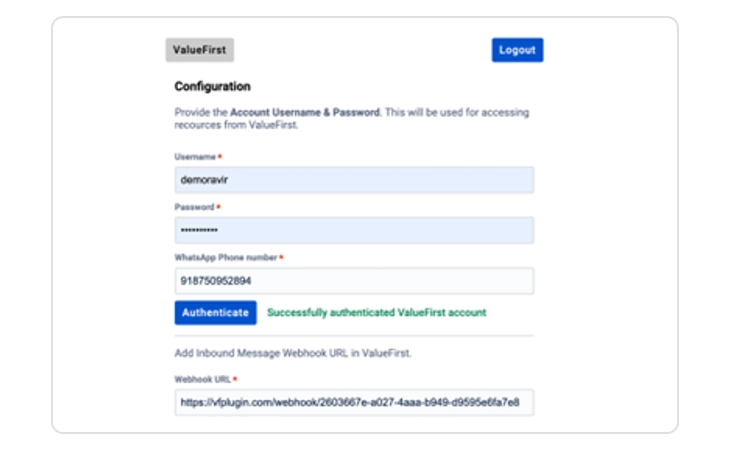
Configure Inbound Messages
- Copy the Webhook URL displayed on the screen.
- Share this URL with your ValueFirst account manager for inbound message configuration.
After completing these steps, your LeadSquared account will be successfully configured to send WhatsApp messages using ValueFirst. If you encounter any issues, please contact the ValueFirst support team for assistance.